cataclysm professions guide
Cataclysm Classic revamps professions, offering exciting tiers and bonuses. Mastering these skills is crucial for gearing and profit, impacting gameplay significantly.
Overview of Cataclysm Professions
Cataclysm Classic introduces substantial changes to all professions, moving beyond simple item creation towards impactful gameplay benefits. Gathering skills – Herbalism, Mining, and Skinning – provide essential resources, while crafting professions like Alchemy, Blacksmithing, and Engineering offer powerful consumables, gear, and gadgets.
Inscription and Jewelcrafting provide unique items, and Tailoring/Leatherworking focus on armor. Each profession boasts specific enchant slots and synergistic combinations for maximizing profit and player power. Understanding these changes is key to thriving in the revamped Cataclysm economy.

Why Professions Matter in Cataclysm
In Cataclysm Classic, professions are no longer secondary; they’re integral to character progression and raid success. Crafting professions provide gear upgrades, essential consumables like potions and flasks, and unique items unavailable elsewhere. Gathering professions fuel the economy and offer opportunities for substantial gold-making.

Profession bonuses, like Herbalism’s Haste buff, can be raid-saving. Strategic profession combinations unlock maximum profit potential, making mastery a significant advantage for any player seeking to optimize their character.

Gathering Professions
Cataclysm’s gathering skills – Herbalism, Mining, and Skinning – provide essential resources for crafters and players seeking economic opportunities within Azeroth.
Herbalism
Herbalism remains a vital gathering profession in Cataclysm Classic, supplying alchemists and inscriptionists with crucial materials. A unique benefit is the Herbalism Lifeblood, granting a Haste bonus – potentially raid-saving! At rank 8, it provides 480 Haste for 20 seconds on a 2-minute cooldown. This translates to 80 Haste, making it exceptionally useful. Mastering herbalism unlocks access to new herbs found throughout Azeroth, essential for crafting powerful potions and glyphs.
Herbalism Leveling Guide (1-525)
Leveling Herbalism in Cataclysm Classic involves efficiently gathering herbs across various zones. Focus on commonly found herbs in early levels, progressing to higher-level zones as your skill increases. Utilize online resources detailing optimal farming routes for each bracket. Remember to check auction house prices to maximize profits while leveling. Prioritize zones with dense herb populations and minimal competition for faster skill gains. Consistent gathering will quickly propel you to 525!

Unique Herbalism Benefits & Lifebloods
Cataclysm Herbalism introduces “Lifebloods,” a unique on-use haste bonus. At rank 8, Lifebloods grant 480 haste for 20 seconds on a 2-minute cooldown – potentially raid-saving! This benefit makes Herbalism surprisingly valuable beyond material gathering. Herbalists can contribute directly to raid performance. Maximizing Lifeblood usage requires understanding encounter timings and coordinating with your team for optimal haste windows.
Mining
Cataclysm Mining focuses on gathering ores essential for Blacksmithing, Engineering, and Jewelcrafting. Key ores include Saronite, Titanium, and Adamantite, each used in crafting high-level gear and devices. Efficient Mining requires navigating new zones and utilizing Mining skill increases. Prospecting ore yields valuable gems, boosting Jewelcrafting profits. Mastering Mining provides a steady income stream and supports other crafting professions, making it a cornerstone of self-sufficiency.
Mining Leveling Guide (1-525)
Begin by mining Copper and Tin in starting zones (1-75). Progress to Iron (75-150) in Burning Steppes and Searing Gorge. Silver (150-225) is abundant in Un’Goro Crater. Mithril (225-300) can be found in Badlands and Hinterlands. Thorium (300-375) is best farmed in Burning Steppes. Finally, Saronite (375-450) and Titanium (450-525) are located in Northrend zones, completing your journey.
Key Ores and Their Uses
Titanium Ore is vital for crafting the highest-level gear. Saronite Ore fuels powerful enchantments and epic-quality items. Thorium Ore is essential for engineering gadgets and high-end blacksmithing. Mithril Ore serves as a core component for many crafted weapons and armor pieces. Iron Ore is foundational for early-game crafting, while Copper and Silver are used in lower-level recipes.
Skinning
Skinning allows players to harvest hides from beasts, providing materials for Leatherworking. It’s a profitable gathering profession, especially with the demand for crafted armor. Valuable resources include Heavy Borean Leather, Arctic Fur, and Rugged Leather. Skinning complements Leatherworking perfectly, offering self-sufficiency. Efficient leveling involves targeting areas densely populated with skinnable creatures, maximizing yield and minimizing downtime. It’s a relatively straightforward profession to master.
Skinning Leveling Guide (1-525)
Begin in the starting zones, skinning every beast possible. Progress to higher-level areas like Nagrand and Sholazar Basin for faster leveling. Focus on zones with high beast density. Utilize skinning knives to increase yield. Consider selling excess materials on the Auction House for profit. Prioritize areas with creatures that yield valuable hides. Reaching 525 requires consistent effort and efficient route planning. Remember to check for daily quests offering skinning rewards.
Valuable Leathers and Scales
Heavy Borean Leather and Arctic Fur are highly sought after for crafting durable gear. Rugged Leather remains valuable for lower-level recipes. Dragonscale Leather, obtained from dragons, fetches a high price. Frosthide Leather is essential for cold-weather resistance gear. Scales like Primal Scales are used in various crafting recipes. Market prices fluctuate, so monitor the Auction House. Efficient skinning and strategic selling maximize profits. Consider specializing in specific leather types based on demand.
Crafting Professions
Cataclysm introduces revamped crafting, including Alchemy, Blacksmithing, Enchanting, Engineering, Inscription, Jewelcrafting, Leatherworking, and Tailoring, each with unique benefits.
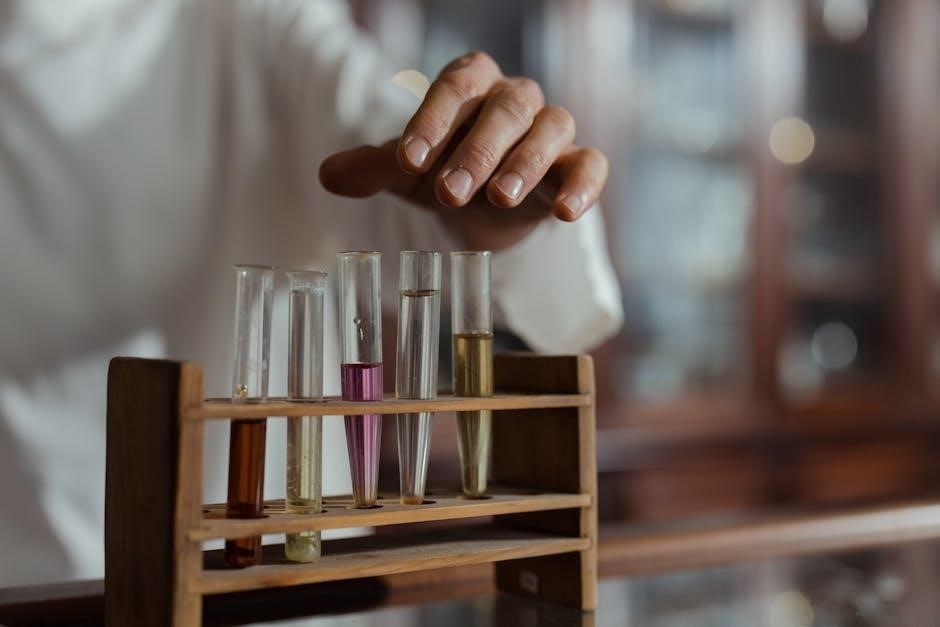
Alchemy
Alchemy in Cataclysm Classic provides a diverse range of potions, flasks, and transmutations, becoming incredibly valuable for players across Azeroth. Alchemists can significantly aid others, offering essential consumables for raiding and PvP. Leveling from 1-525 involves gathering herbs and crafting increasingly complex recipes. Expect a fun and exciting experience, with opportunities for substantial gold-making through sought-after items. Mastering Alchemy unlocks powerful tools for self-sufficiency and market dominance, making it a highly desirable profession.
Alchemy Leveling Guide (1-525)
Leveling Alchemy in Cataclysm Classic requires diligent herb gathering and recipe acquisition. Focus on crafting what sells well on the Auction House. Early levels involve basic potions, progressing to flasks and transmutation as skill increases. Utilize online databases to find efficient leveling paths and optimal recipes. Prioritize recipes requiring readily available materials. Remember to check vendor availability for key ingredients. Consistent crafting and smart resource management are key to reaching 525 quickly and profitably.
Potions, Flasks, and Transmutations
Cataclysm Alchemy introduces a wealth of new potions, flasks, and transmutations. Potions provide immediate benefits, while flasks offer extended, powerful buffs for raiding and PvP. Transmutations allow converting ores into valuable gems, offering a unique profit avenue. Mastering these crafts is vital for self-sufficiency and market dominance. Alchemists can create consumables sought after by all classes, ensuring consistent demand and lucrative opportunities. Experiment with different recipes to maximize profits and cater to player needs.
Blacksmithing

Cataclysm Blacksmithing allows crafting powerful weapons and armor, catering to various specializations. Players can focus on weapon crafting, armor smithing, or a blend of both. New patterns unlock throughout leveling, offering diverse gear options. Blacksmiths are essential for equipping themselves and others with high-quality equipment. Mastering this profession requires significant ore gathering and skill investment. The ability to create durable, effective gear makes Blacksmiths highly valued within the community, ensuring consistent demand for their services.
Blacksmithing Leveling Guide (1-525)
Leveling Blacksmithing in Cataclysm involves crafting a wide range of items. Early levels focus on simple tools and weapons using readily available ores. Progressing requires consistent material gathering and completing daily quests. Utilize training to maximize skill gains. Focus on crafting items slightly above your current skill level for optimal experience. Don’t neglect the value of crafting multiple stacks of lower-level items. Reaching 525 demands dedication and efficient resource management, unlocking advanced patterns.
Weapon and Armor Specializations
Cataclysm Blacksmithing introduces specializations, allowing focused crafting. Players can specialize in Weapon or Armor crafting, unlocking unique patterns and bonuses. Weapon specialization excels in creating swords, axes, and maces, catering to damage-dealing classes. Armor specialization focuses on plate, mail, and leather armor, supporting tanking and hybrid roles. Choosing a specialization impacts available recipes and crafting efficiency, demanding strategic consideration based on character needs and market demands.
Enchanting
Enchanting in Cataclysm Classic remains vital for gear optimization. Players disenchant unwanted items, obtaining materials to create powerful enchants. New enchantments enhance weapons, armor, and accessories, boosting character stats. Disenchanting provides essential materials, driving market demand. Specific crafting professions receive exclusive enchant slots, creating synergy. Mastering enchanting requires material acquisition, recipe learning, and understanding enchant effects for optimal character builds and potential profit.
Enchanting Leveling Guide (1-525)
Leveling Enchanting 1-525 involves disenchanting greens, blues, and purples. Early levels focus on common enchantments. Utilize readily available materials from vendors and drops. Prioritize leveling alongside a character actively gearing up. Later levels require rarer materials from dungeons and raids. Focus on profitable enchantments to offset material costs. Consistent disenchanting and crafting are key to reaching the skill cap efficiently, maximizing your enchanting expertise.
Disenchanting and Enchant Creation
Disenchanting breaks down items into enchanting materials, crucial for creating new enchantments. Enchant Creation utilizes these materials to apply temporary buffs to gear. Cataclysm introduces new enchanting recipes and materials, expanding possibilities. Focus on disenchanting items with valuable shards. Profitable enchantments depend on current market demands. Mastering both aspects is vital for maximizing profits and providing valuable services to other players, enhancing your enchanting prowess.
Engineering
Engineering in Cataclysm Classic provides unique gadgets, devices, and mounts unavailable elsewhere. Leveling involves crafting various tools and contraptions, requiring mining and blacksmithing skills. Engineers create helpful items like bombs, scopes, and repair bots. The profession is renowned for its fun and utility. Acquiring schematics is key to progression. Expect a high demand for engineering creations, offering substantial profit opportunities and a distinct advantage.
Engineering Leveling Guide (1-525)
Leveling Engineering from 1-525 involves a mix of crafted items and daily quests. Early levels focus on basic tools and ammunition. Utilize mining for essential materials like iron and copper. Progress through crafting scopes, bombs, and mechanical parts. Daily quests in major cities offer significant experience gains. Don’t neglect learning new schematics; they’re vital. Prioritize crafting items that are in demand on the Auction House for profit while leveling.

Gadgets, Devices, and Mounts
Engineering in Cataclysm Classic is renowned for its unique gadgets and devices. Expect items like jetpacks, grappling hooks, and various utility tools. These offer mobility and situational advantages. Engineers can craft powerful bombs and explosives for PvP and PvE. The pinnacle of Engineering is access to exclusive mounts, like the Mechano-Hog and flying machines. These mounts provide distinct advantages and are highly sought after by players, making Engineering a valuable profession.
Inscription
Cataclysm Classic’s Inscription allows players to create powerful Glyphs, enhancing spells and abilities. These Glyphs are essential for optimizing character performance in both PvE and PvP content. Beyond Glyphs, Inscription crafts Darkmoon Cards, used for obtaining unique rewards during the Darkmoon Faire. Mastering Inscription provides a consistent income stream and valuable benefits for personal character progression, making it a popular choice among players seeking customization and power.
Inscription Leveling Guide (1-525)
Leveling Inscription in Cataclysm Classic involves gathering herbs and pigments. Focus on crafting basic Glyphs early on, utilizing readily available materials. As you progress, prioritize higher-level Glyphs and Darkmoon Cards to maximize skill gains. Efficient leveling requires strategic material acquisition and consistent crafting. Utilize online resources and guides to identify profitable Glyphs and optimize your leveling path, reaching 525 efficiently and unlocking advanced recipes.
Glyphs and Darkmoon Cards
Cataclysm Inscription centers around Glyphs, enhancing class abilities, and Darkmoon Cards, used for unique buffs and trading. Mastering Glyph creation requires consistent herb gathering and pigment production. Darkmoon Cards offer a lucrative market, especially during Darkmoon Faire. Successful Inscriptionists balance Glyph demand with Darkmoon Card speculation, maximizing profits. Understanding class needs and market trends is vital for profitability, making Inscription a rewarding profession.
Jewelcrafting
Jewelcrafting in Cataclysm Classic focuses on gem cutting and jewelry creation, providing significant stat boosts. Prospecting ores yields gems for cutting into powerful enhancements. Jewelcrafting offers unique meta-gem sockets, maximizing gear potential. The profession’s market relies heavily on demand for specific gem types. Successful Jewelcrafters adapt to raid compositions and player needs, ensuring consistent profits. Mastering Jewelcrafting requires efficient ore acquisition and skillful gem cutting techniques.
Jewelcrafting Leveling Guide (1-525)
Leveling Jewelcrafting involves prospecting ores – Saronite, Titanium, and Storm Crystals – to obtain gems. Focus on cutting gems to gain skill points, prioritizing those in demand. Daily quests offer substantial experience; Utilize cut gems for crafting jewelry, supplementing skill gains. Prospecting efficiency increases with skill, maximizing gem yield. Consider purchasing ore from the Auction House to accelerate leveling. Reaching 525 unlocks access to epic gems and meta-socketing, crucial for end-game gearing.
Gem Cutting and Jewelry Creation
Jewelcrafting excels in gem cutting, transforming raw stones into powerful enhancements. Cutting yields various gem qualities – common, uncommon, rare, and epic – impacting stats. Jewelry creation involves rings, necklaces, and epic gems for meta-socketing. Prospecting ores provides the base materials, while daily quests offer bonus gems. Mastering gem cutting maximizes profit, supplying players with stat boosts. Epic gems are vital for raid progression, making Jewelcrafting highly sought after.
Leatherworking

Leatherworking crafts leather and mail armor, catering to Hunters, Rogues, and Shamans. Leveling involves tanning hides from Skinning, creating various armor pieces. Specializations focus on either leather or mail, influencing crafted items. Leatherworking also provides unique enchants specifically for bracers, offering a distinct advantage. Mastering this profession allows for self-sufficiency or lucrative sales, supplying essential gear to players. The demand for crafted armor remains consistently high throughout Cataclysm Classic.
Leatherworking Leveling Guide (1-525)
Leveling Leatherworking begins with tanning hides obtained through Skinning. Early levels focus on simple leather items like pouches and belts. Progress efficiently by crafting items requested in quests. Utilize readily available materials to minimize costs. At higher levels, concentrate on crafting mail armor pieces for Shamans, maximizing experience gains. Remember to check the Auction House for profitable materials and crafted goods, supplementing your leveling process and boosting income.
Leather and Mail Armor Crafting
Leatherworking in Cataclysm specializes in crafting both leather and mail armor. Leather armor caters to Rogues and Druids, while mail armor is essential for Hunters and Shamans. Mastering patterns for these armor types is vital. High-quality materials yield superior stats. Consider specializing in one armor type for focused skill advancement and increased crafting efficiency. Regularly check the Auction House to identify profitable armor pieces and material demands, maximizing your earnings.
Tailoring
Tailoring in Cataclysm Classic focuses on crafting cloth armor, primarily for Mages, Warlocks, and Priests. Beyond armor, Tailors create valuable bags, essential for inventory management. A unique aspect is the ability to enchant cloaks exclusively. Mastering patterns and sourcing high-quality cloth are key to success. Tailoring offers a steady income stream through bag sales and crafted gear. Efficient leveling involves focusing on readily available materials and fulfilling market demands.
Tailoring Leveling Guide (1-525)
Leveling Tailoring from 1-525 in Cataclysm Classic involves a mix of crafting and purchasing patterns. Early levels focus on Linen and Wool cloth items. Progress efficiently by crafting Bolt of Cloth, then moving to higher-tier materials like Silk and Mageweave. Prioritize quests offering tailoring recipes. Utilize Auction House purchases for patterns you can’t find. Remember to consistently craft items to gain skill points, maximizing your leveling speed and minimizing material waste.
Cloth Armor and Bags Creation
Tailoring in Cataclysm Classic excels at crafting cloth armor, particularly robes, chests, and cloaks, catering to casters. A key benefit is creating bags – essential for inventory management and a consistent source of gold on the Auction House. Tailoring also uniquely enchants cloaks, providing a valuable customization option. Mastering high-end patterns unlocks powerful gear for raiders and PvP enthusiasts, making it a profitable and sought-after profession.

Profession Bonuses and Synergies
Cataclysm introduces unique profession bonuses, like enchanting specific gear slots. Combining professions strategically maximizes profit and unlocks powerful crafting advantages for players.
Crafting Profession Bonuses ─ Specific Enchant Slots
Cataclysm Classic introduces a novel system where crafting professions grant exclusive enchanting capabilities on specific gear slots. Tailoring uniquely enchants cloaks, providing a distinct advantage for those specializing in cloth armor. Leatherworking focuses enchantments solely on bracers, benefiting mail and leather wearers. Jewelcrafting’s enchantments are limited to rings, enhancing gem-cutting synergy.
These specialized bonuses encourage profession diversification and create a demand for collaborative crafting, fostering a dynamic player economy. Understanding these limitations is key to optimizing gear enhancements.
Profession Combinations for Maximum Profit
Maximizing profits in Cataclysm Classic often involves synergistic profession pairings. Combining gathering skills like Herbalism with Alchemy allows self-sufficiency and control over potion ingredients. Mining and Jewelcrafting create a powerful loop for gem cutting and jewelry sales. Leatherworking and Skinning provide a consistent supply of materials for crafting mail armor.
Engineering paired with Mining offers gadget creation opportunities, while Inscription benefits from Herbalism for glyph production. Strategic combinations minimize reliance on the Auction House, boosting overall earnings.